Page 9 of 18
Re: Shadow Build

Posted:
Sun Jun 05, 2022 11:17 pmby John H
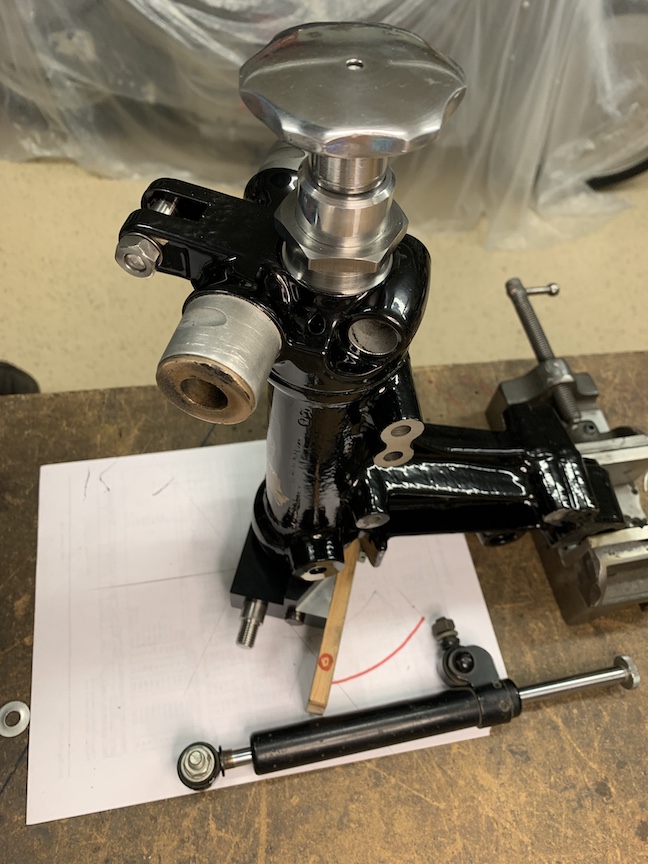
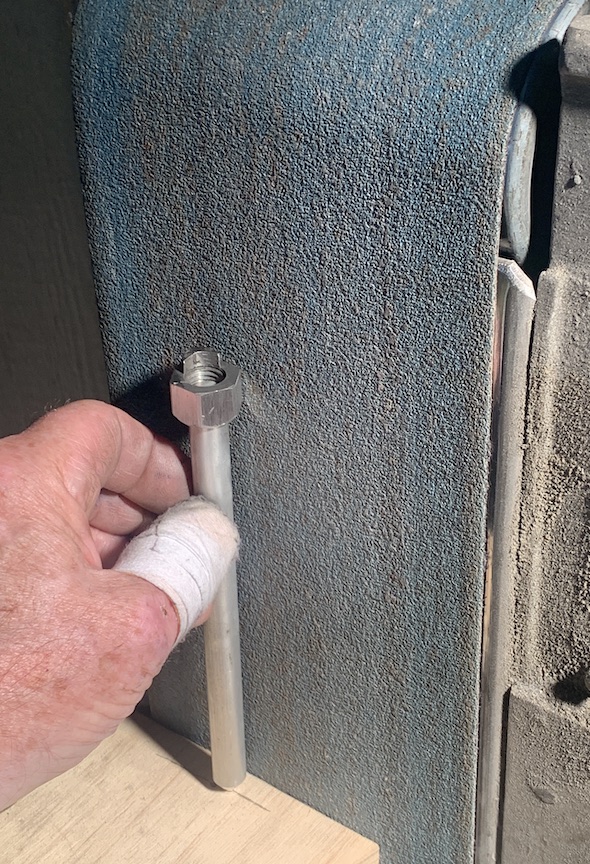
The original damper used a fiber friction disk between metal disks. The drag / tension was set by tightening the knob at the top of the steering stem.This caused twitchy steering and did very little to stop a high speed wobble.
I'm going to use a hydraulic damper similar the ones used on early Kawasaki and other bikes. There is very little space to fit so the bracket that mounts the unit to the head bolt will have to be made later on. The lock to lock radius and the distance the damper rod travels gives me the location for the piston end of the damper.
- IMG_5685.JPG (188.42 KiB) Viewed 13129 times
- IMG_5693.JPG (287.42 KiB) Viewed 13129 times
Re: Shadow Build
Posted:
Mon Jun 06, 2022 10:54 pmby John H
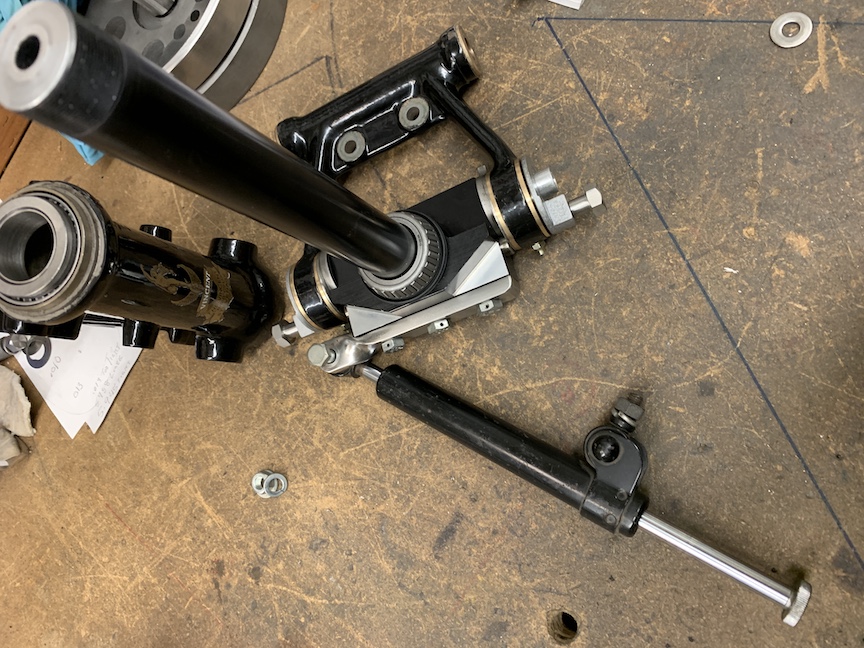
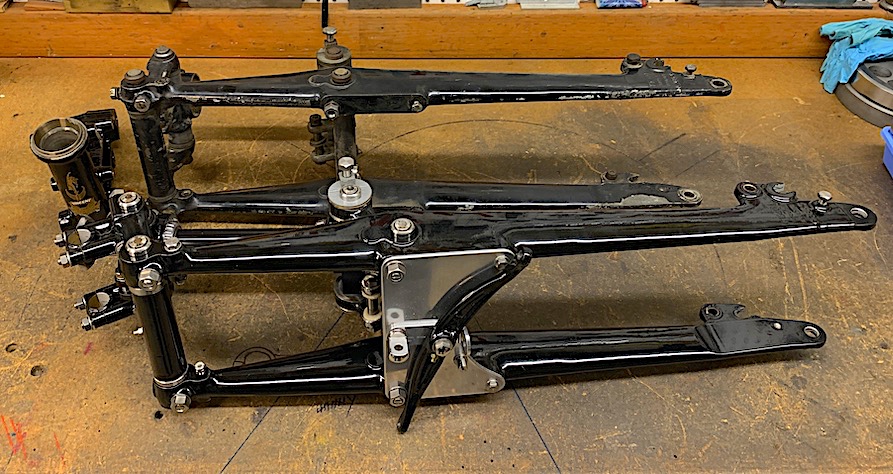
The girdraulics are finished for now. The speedo bracket, headlamp tubes, springs and spring boxes will be added after the forks are mounted on the bike. Still need to rebuild the shock, which will be updated with different seals and piston mods. I should have rebuilt the other set of forks while going through the motions.
It will get cad plated parts instead of ss parts.
- IMG_5697.jpg (246.34 KiB) Viewed 13123 times
Re: Shadow Build
Posted:
Sun Jun 12, 2022 9:15 pmby Vincent
Hi John, what is your plan for setting the height of the rear eccentrics relative to the forward pivot point on the girdraulics?
Re: Shadow Build
Posted:
Sun Jun 12, 2022 9:23 pmby John H
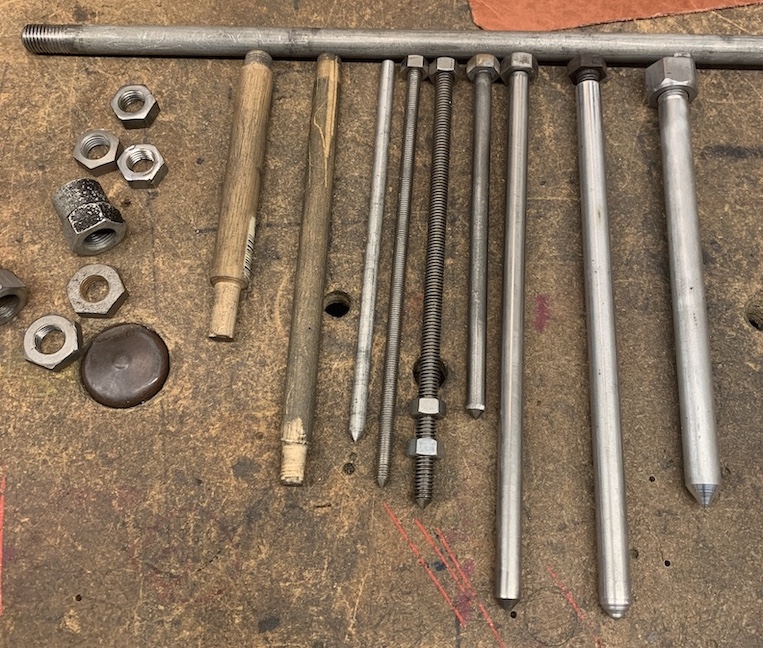
Doing some of the boring detail work that goes along with the typical restoration. Years of wrenching on the nuts and bolts with a heavy hand or the wrong tool makes for some sad looking pieces. There is 6 different sizes of nuts with 5 different thread pitches so the photo shows just a few of the tools. I will take the time to dress these just enough that when they are all cad plated they will look almost as good as new. I have several pointed rods that match the nuts and bolts such that I can lightly sand the flats then re-machine the exposed ends that have been battered. All the pieces will then get bead blasted before plating. It's time consuming but necessary.
- IMG_5715.JPG (291.13 KiB) Viewed 13083 times
- IMG_5713.JPG (287.69 KiB) Viewed 13083 times
Re: Shadow Build
Posted:
Mon Jun 13, 2022 7:26 amby Lotus54
Wow, what a great idea. Looks like an excellent way to hold the parts so you can clean them up.
Re: Shadow Build
Posted:
Mon Jun 13, 2022 8:33 pmby Vincent
What grit sand paper are you using? Is your girdraulic set up going to be stock or will you modify it to help suppress tank slappers, and if so, what is your approach?
Re: Shadow Build
Posted:
Tue Jun 14, 2022 7:42 amby John H
Vince, my post on June 5 gives details of attachment of the steering damper. The eccentrics will be left in the original non-sidecar position basically for appearance. I could have eliminated them completely and made a concentric spindle.
Dressing the nuts and bolts can be done with 120 grit abrasives. The bead blaster and cad plating will remove the sanded marks. Basically just test the procedure until you get the results you want. Of course removing too much metal means the wrench will be too loose so it's not always a perfect solution.
Re: Shadow Build
Posted:
Wed Jun 22, 2022 7:57 amby John H
Been away for a while then trying to help a friend determine some flow numbers on some heads that have been ported. Very interesting when comparing a stock head to one that was suppose to improve performance. It's kind of a black art. I have a lot to learn in testing and deciphering results.

- IMG_5730.jpg (237.96 KiB) Viewed 12995 times
Re: Shadow Build
Posted:
Sun Jul 24, 2022 11:40 pmby John H
Sorry I haven't posted any updates recently. Hope to be back in the shop next week and get things rolling again. Been battling the Big C bug the past few days.
If you have been following Alp's Racing with the new Triumph build. The bike went 176 +- which is nearly 10 mph over the old record. Very impressive, and on a bike that looks like a show bike.
Re: Shadow Build
Posted:
Thu Aug 04, 2022 9:28 amby John H
You may remember back in earlier posts where I built up my crankshaft with a oversize big end pin set only to find out I had bored the flywheels off plumb due to the mill spindle being off. Rather than taking the time to re-weld the bores and start over. So I have resorted to another set of flywheels for the job.
It's difficult to find flywheels that haven't at some point been rebuilt and in this case the mainshaft has sheared the mills pin and spun in its bore. The weld repair looks ok but it appears some kind of nickel rid was used causing hard spots. Hopefully I can get through this by the time I get from the 1" bore out to the new 1.125 bore. If It doesn't mic perfect by the time I"m within .010 of the finish cut I will have to grind the bore to .006 finish which is the press fit tolerance I want. We'll see.
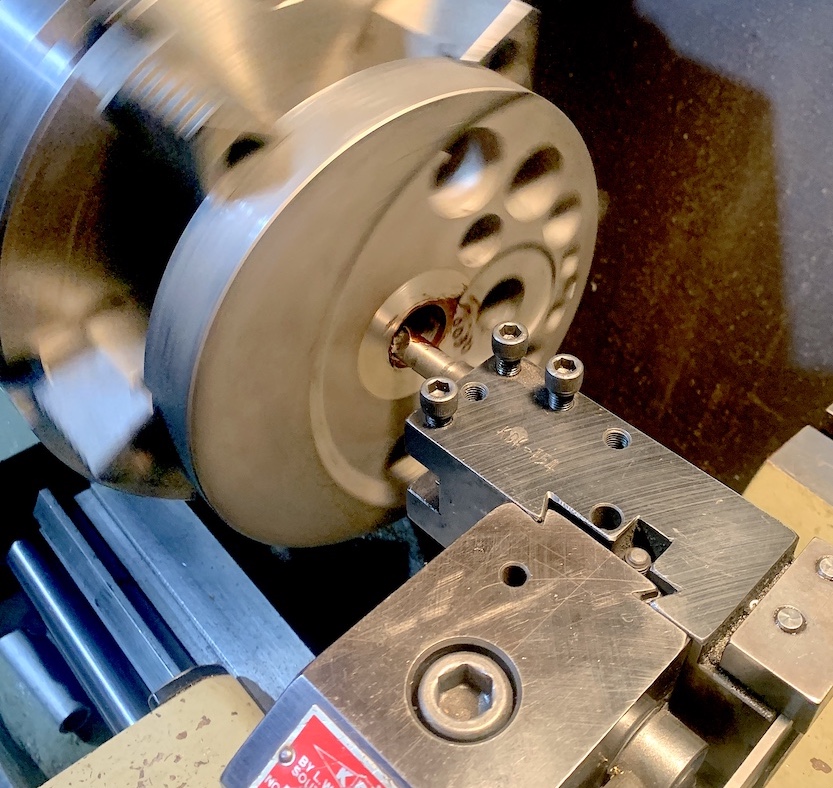
- IMG_5944.JPG (274.49 KiB) Viewed 12724 times
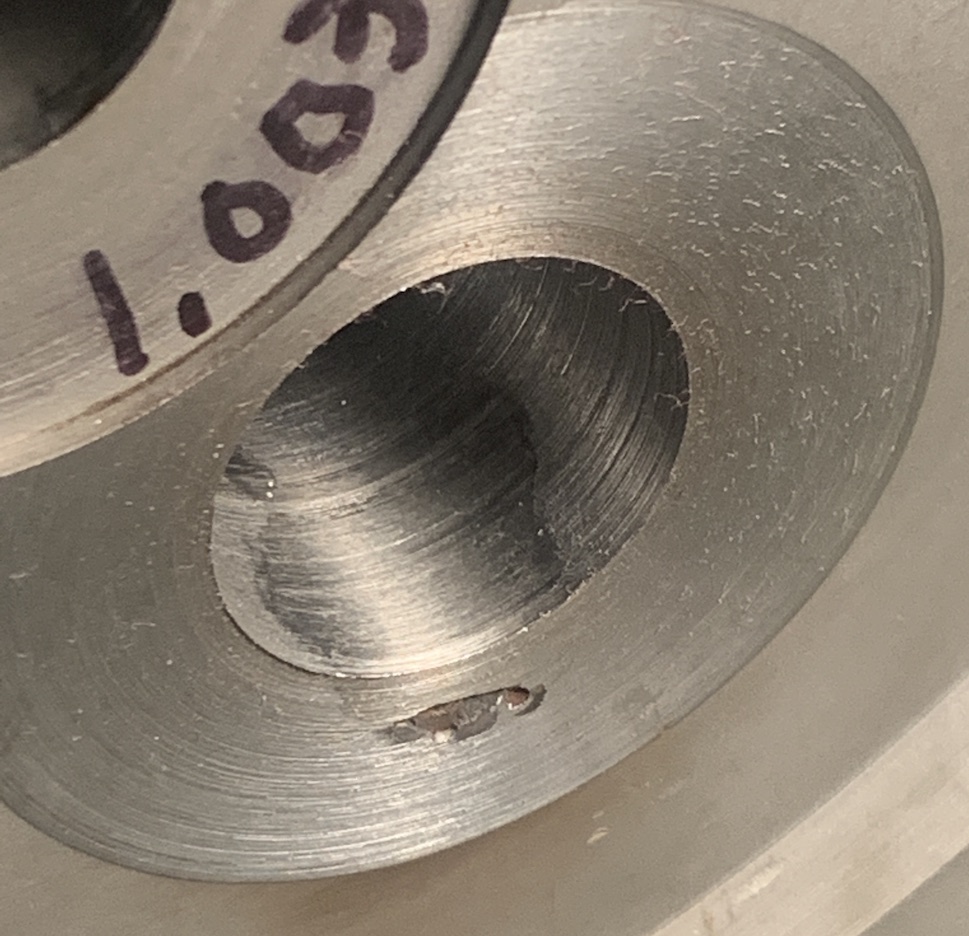
- IMG_5945.JPG (219.34 KiB) Viewed 12724 times